Introduction
Excellent esthetics is essentially the primary requisite for anterior restorative dental treatments. To produce esthetically pleasant anterior restorations, clinicians combine artistic skills with fundamental knowledge of tooth anatomy and morphology, along with the use of appropriate restorative materials. Dental composites have emerged as the undisputed champion of all the direct restorative materials for esthetic rehabilitation.1 The present case report describes a systematic approach to rebuild the lost anatomy of a maxillary central incisor with dental composites.
A 27-year-old male patient came to the department Of Oral Medicine and Radiology at DAV Dental College and after the preliminary examination, he was referred to the Department of Conservative Dentistry and Endodontics for the needful.
Clinical Case
Diagnosis
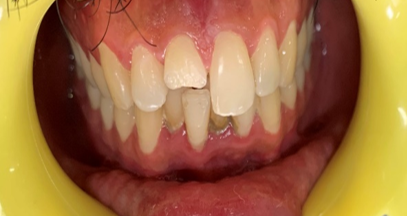
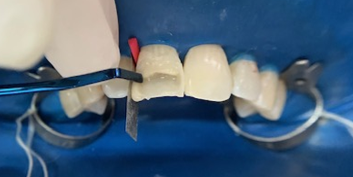
The patient presented with a horizontally fractured right central incisor involving the incisal edge, a G.V. Black’s Class IV restoration. The fracture accounted for 35-40% of the missing tooth structure (Figure 1).
The patient was mainly concerned with his appearance as there was no pain, sensitivity or swelling associated with the concerned tooth. The pulp responded normally to the pulp vitality tests. The clinical and radiographic examination also showed no involvement of pulp and healthy periapical and periodontal tissues. It was classified as an Ellis Class 2 fracture.
After discussing all the possible treatment plans, i.e. direct and indirect restorative treatments, composites, veneer and crowns; the patient agreed on a direct composite resin restoration due to the need of fewer clinical sessions, low cost, its repairability and mainly for being a conservative treatment option. The patient was informed, and consent was taken to perform the proposed treatment plan. Prophylaxis was initiated in the region with a prophylactic paste, followed by colour selection.
Clinical steps
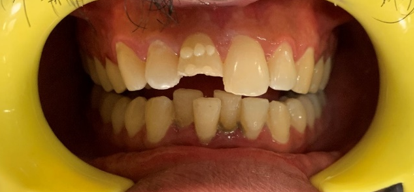
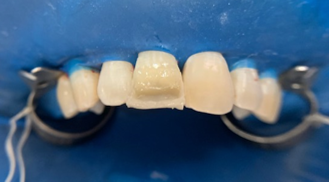
Instead of a conventional approach of using VITA shade guide, small buttons of different shades of composite (Figure 2) (1 to 1.5 mm) were placed (without etching or bonding) on the cervical and middle thirds of the tooth; to have a better chance of shade selection.2, 3 The placed composite was then cured.
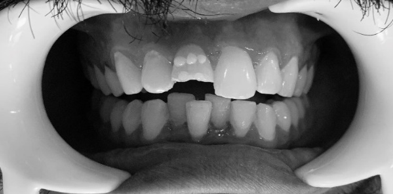
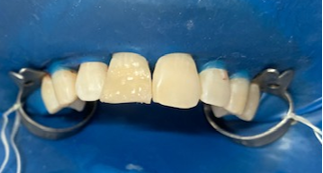
A black and white image (Figure 3) was taken, and then the buttons were compared; to match the value of shade. 4
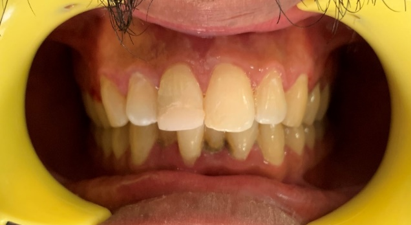
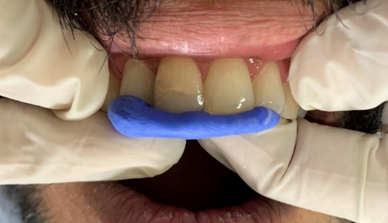
A temporary restoration of the tooth (mock-up) (Figure 4) using the stratified technique (i.e. different types and shades of composite) was done. An addition silicone impression putty material (Aquasil, Dentsply Aquasil Soft Putty) lingual matrix (Figure 5) was fabricated directly inside the patient’s mouth using the lingual surface of the mock-up tooth and the adjacent teeth as a guide. 5
The patient was recalled the next day to get acquainted with the tooth restoration, shape, size, phonetics and bring any feedbacks.
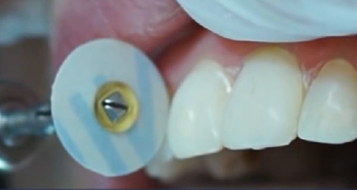
The existing restoration on the right central incisor was removed. A 1-1.5 mm 75◦ functional esthetic bevel was prepared using a tapered diamond bur on the facial surface. A functional lingual bevel at 45◦ was also placed. A coarse disc was then used to extend the facial bevel interproximally and towards the gingival surface to create an “infinite bevel”; with which the composite resin margin would be indistinguishable after restoration. 6
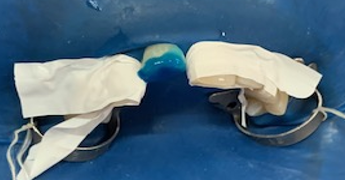
In the next step, the operative field was isolated with a rubber dam. Teflon tape (Figure 6) was placed on the adjacent teeth to prevent their etching. Then the enamel was etched with 37% phosphoric acid (Gluma, Kulzer) for 20 seconds. The acid etchant was then rinsed for 40seconds, and excess water was eliminated.
The adhesive (Gluma Bond 5, Kulzer) was applied with a disposable brush (Microbrush). Adequate solvent evaporation was ensured before light-curing (20 seconds) (3M Epilar Deep Cure).1
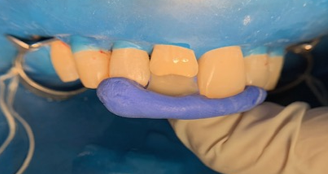
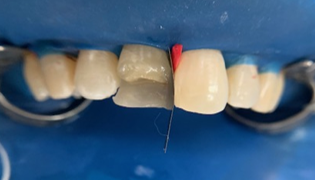
The lingual putty matrix was then seated, followed by application of the lingual layer of body shade composite resin (Charisma submicron-hybrid composite, Kulzer) to form a palatal shelf (Figure 7, Figure 8). After light curing the first increment, the putty matrix and Teflon tape were removed, and a matrix band was placed to restore the contacts and interproximal walls (Figure 9).
A low translucent resin was used to reproduce the mesial thirds of the dentin and dental structures. High translucent shades were used to finish the facial enamel (Figure 10, Figure 11).
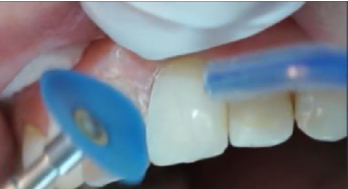
The finishing and polishing (Figure 12, Figure 13) were done in the next session, with coarse and medium coarse discs (SHOFU Super Snap Rainbow Technique Kit) following the contours of the contralateral tooth.
Discussion
Composite restoration offers a cost-effective alternative for esthetic regions. Improved bonding chemistry and introduction of nano-composites are speculated to improve further the success of composite longevity and performance in demanding situations.
In our case study, the restorative mock-up prepared ensured greater outcome predictability; since the composite resin changes colour during polymerization, as well as 24 and 48 hours after polymerization. Mock-up also gave time for the patient to report required changes after use.
The button try-in method made sure a better colour matching as compared to the VITA shade guide. The VITA shade guides should be avoided for matching the shade because they are meant to match the shade for ceramics and not composites as they are polymerized, not processed. Further can also lead to cross-infection.2
The image taken in a black and white format helps to compare the value of shade. To the untrained eye, the colour of a tooth is white or yellow. The human eye is primed to appreciate value differences are more noticeably in a dental restoration when compared to hue and chroma. Value is the only dimension that can exist on its own. Example in a black and white picture, only value can be appreciated not the hue or chrome. 4
The lingual putty guide helped to create the final lingual shelf during restoration which formed the base of the restoration. 5
A two-step bevelled approach was used in this case report. The first bevel was steep and 2mm wide, which allowed enough enamel rods to expose and make long-lasting bonding. The second bevel was much shallow and was extended till the cervical third of the tooth, which allowed better shade merging. 6
High-value shades were used to substitute enamel. More chromatic shades were used to replace the middle and the cervical thirds of the crown, where greater chromaticity was required.6
For the development of natural contours during the composite placement, three increment layering was done where the first and second increment recreated the mesial and distal line angles. The third increment was much flatter and filled in the gap between the line angles, where grooves or anatomic structures were sculpted.7
Lastly, finishing and polishing protocol enabled a highly polished surface with a satisfactory result for the patient.
Conclusion
An acceptable outcome of a class 4 composite resin restoration can be achieved by adherence to a systematic protocol outlined in these clinical techniques. With advancements in the improvement of physical, chemical and mechanical properties of dental composites, esthetic and lasting restorations are possible.


