Introduction
It is said that “The road to recovery after an accident is not always a peaceful journey”. It holds true for patients undergoing maxillectomy surgeries. Patients usually have difficulties in speech, deglutition, maintaining oral hygiene.1 To prevent this and help, patient can be given either a prosthetic obturator or surgical reconstruction. An obturator is defined as a maxillofacial prosthesis used to close congenital or acquired tissue opening, primarily of the hard palate or contiguous alveolar soft tissue structure (GPT 9). 2 Prosthodontic restoration of a maxillectomy defect often includes use of a surgical obturator, interim obturator, and definitive obturator.”—GPT 9. 2
Prosthetic obturation is an affordable and sometimes more viable treatment modality than microvascular surgeries particularly in medically compromised and aged patients. The fabrication of hollow obturators has been done by various methods in the past. 3, 4, 5, 6 Disadvantages of these methods are time consuming, operator error, variable thickness of the hollow bulb, increased laboratory work. In this article, a new method for fabrication of two-piece hollow bulb obturator is described which amalgamates the recent 3D printing technique and the conventional compression moulding technique of denture fabrication.
The advantage of this technique is uniform thickness, the precise fit, and stability of two piece the hollow obturator.
Case Report
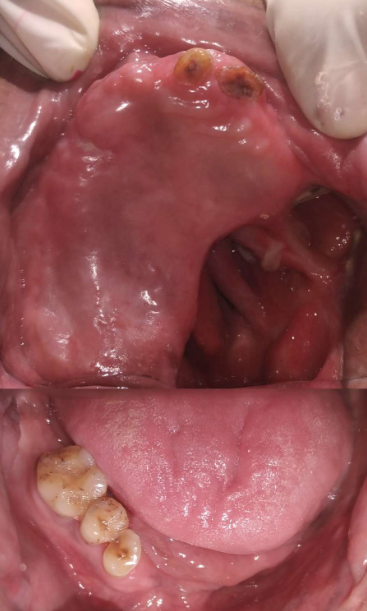
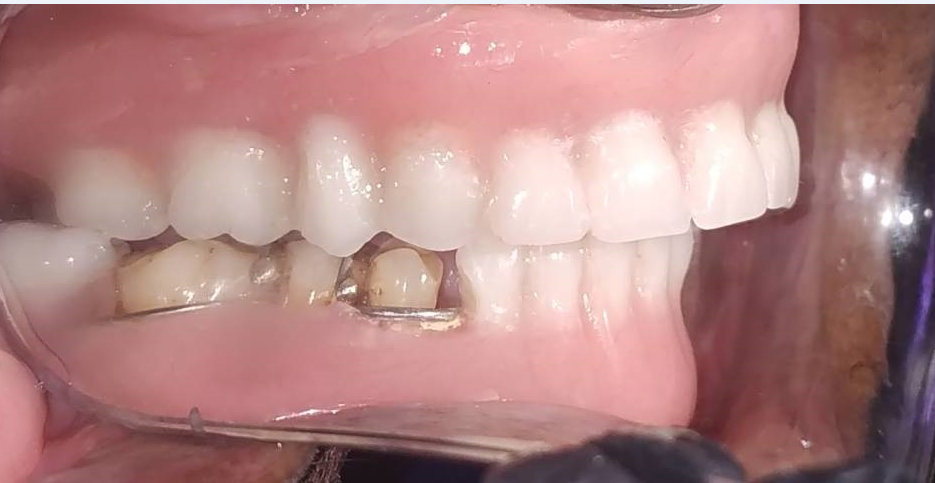
A 69 year old male patient was referred to the Department of Prosthodontics for prosthetic rehabilitation of post maxillectomy defect (Aramany’s Class II) after the surgical removal of left maxilla with squamous cell carcinoma. The defect was extending from right side hard palate extending from molar region and involving the soft palate. Retentive areas were present in the anterolateral part of the defect. Hemi-mandibulectomy (Cantor and Curtis class IV) on the right side of the mandible. Teeth present were 44,45,46 in the lower arch and root pieces 23,24 in the upper arch. Mouth opening was restricted only 25mm and the mandible deviated around 7 mm from mid line on opening. Patient’s main complained were difficulty in chewing, nasal regurgitation of fluids, compromised aesthetics, disharmony and difficulty in speech with nasal twang in his voice. (Figure 1)
Procedure
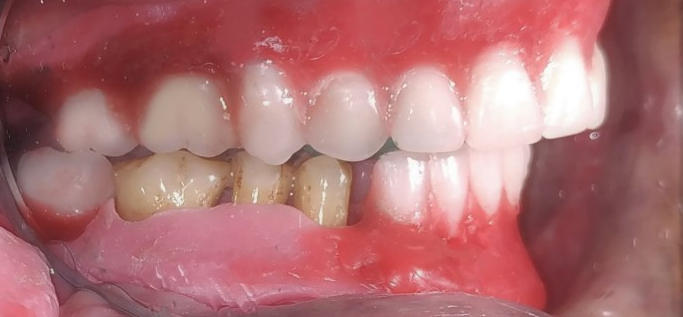
A preliminary impression of Maxillary defect was made with impression compound (Ydent, MDM corporation, Delhi) and mandibular impression was made with irreversible hydrocolloid (Zelgan, Dentsply India). Border molding was carried out on custom made trays with low fusing impression compound (Pinnacle, DPI, Mumbai). Final impression was made with medium body (Aquasil monophase, Dentsply, India) for maxillary and light body (Aquasil lightbody, Dentsply, India) for mandibular arch. Master cast was fabricated using die stone and jaw relation was recorded. A palatal ramp was fabricated on the maxillary denture with the help of low fusing green stick compound and try-in was done. (Figure 2)
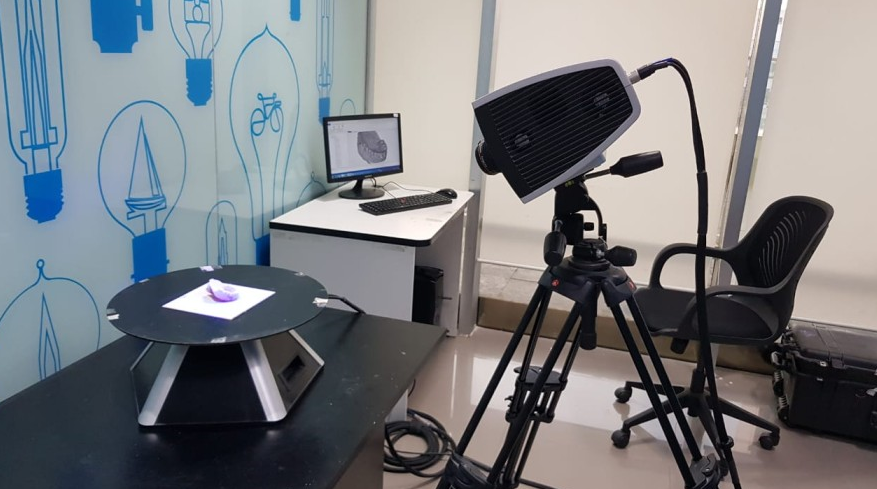
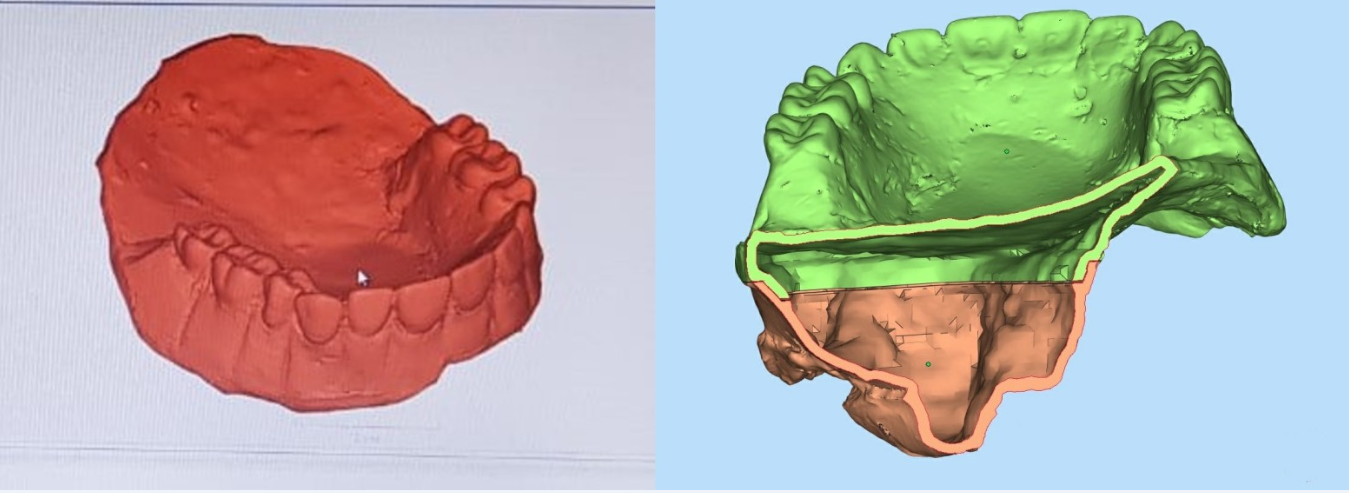
The intaglio surface and the polished surface of the trial denture were scanned digitally with Comet L3D scanner (Figure 3). Magics ver. 24 was used for designing and sectioning the prosthesis to make hollow obturator. A step was incorporated in the design to align the two halves and achieve precise fit after processing (Figure 4).
Due to inaccessibility of the 3D printed denture materials as well as due to additional treatment cost it was planned to amalgamate the recent 3D printing technique and the conventional compression moulding technique of denture fabrication.
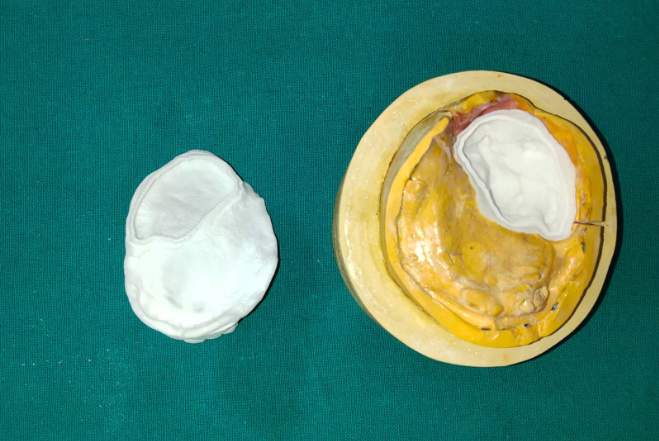
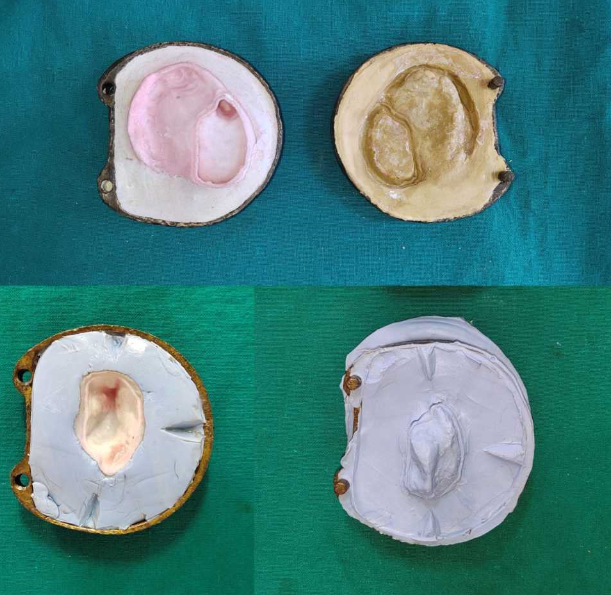
Rapid prototype (RP) of the two section of hollow obturator processed with nylon powder (polyamide 12) of 40 microns sintered at 175 to 180degree centigrade using a CO2 laser in N2 environment. The fit was checked on the cast first and then in the patient’s mouth. (Figure 5) Undesirable undercuts were blocked out. Each section was flasked separately using dental stone and lab putty. (Figure 6) After retrieval of the 3D printed parts, the teeth set used in waxed up denture was placed in the indentations of the mold. Further processing was done by conventional method. (Figure 7)
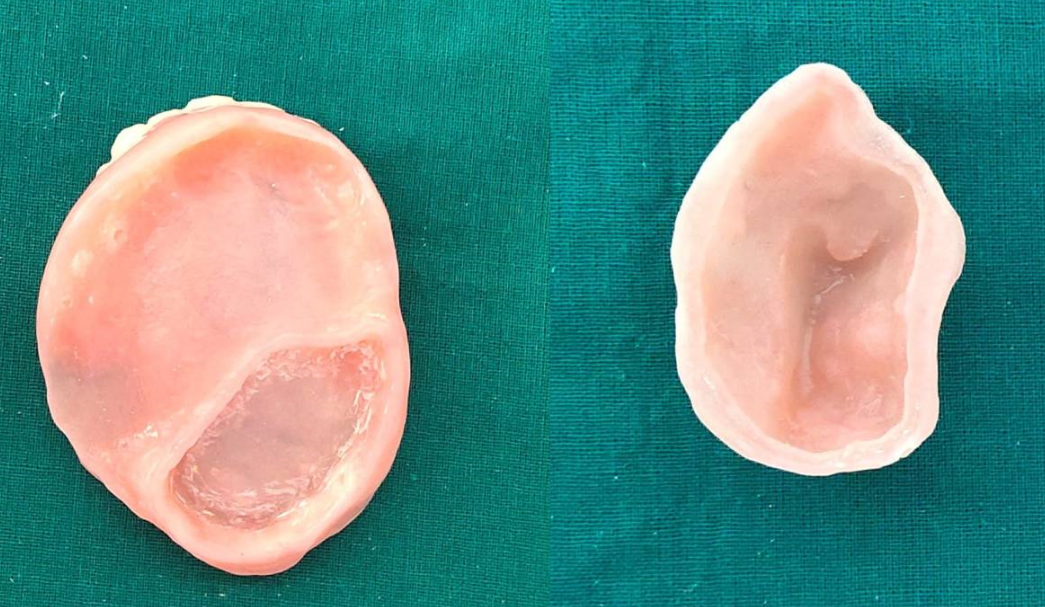
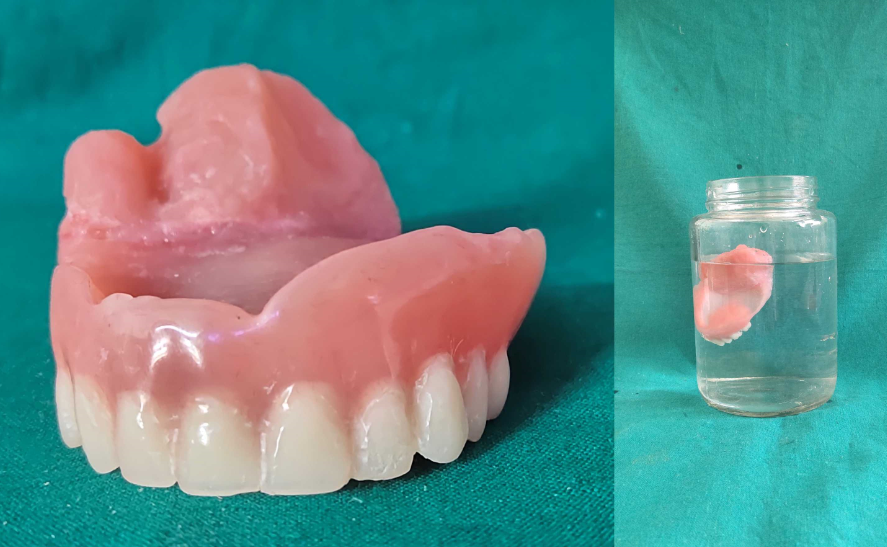
After processing, the two halves were assembled together with the help of the step provided and sealed with auto-polymerizing acrylic resin. (Figure 8) It was then lined with permanent soft liner (GC Reline Soft). Final fit of the obturator was adjusted intraorally and any interferences were removed (Figure 9). At the time of follow-up at every week for the first month. Then monthly follow-up for 6 months. The patient was very comfortable using the obturator and hygiene was well maintained.
Discussion
The maxillary obturator must be light weight and aid in retention, stability, patient comfort, and cleanliness.1 Different methods are available in the literatures for fabrication of obturators like one piece or two-piece hollow obturator. Different materials such as modelling clay, 3, salt, 4 putty5 Alum 6 were incorporated to fabricate one-piece hollow bulb obturators, Two-piece obturators can be fabricated by using silicon bulbs, press studs and magnets. 7 Disadvantages of these methods are time consuming, operator error, increased laboratory work. When putty is used for hollow obturator, owing to its hardness, there is difficulty in removal which hinders the hollow formation. 8 Alum fails to give a complete uniform thickness to the hollow bulb. 6 When sugar is used, the probability of sugar not being able to entirely dissolve can leave a niche for the bacterial growth. 9 Also it is difficult to control the shape and size while packing sugar and salt. Clay and waxes can perforate the denture which is a major disadvantage that can be encountered.9 There may be a chance of dimensional instability with two-piece techniques.
Rapid prototyping is a recent technique of fabricating a model or assembly part quickly using three-dimensional computer aided design (CAD) data. Rapid prototyping (RP) includes a variety of manufacturing technologies, most commonly done by using 3D printing or "additive layer manufacturing" technology. There are a number of rapid prototyping advantages, such as being able to gain a more complete picture of how a product will look or perform in the early stage of the design and manufacturing cycle, allowing changes or improvements to be implemented earlier in the process. RP has been recently used in the fabrication of complete dentures. 10 However this technique has not yet been reported in fabrication of obturator. In this case RP was used to create two halves of the hollow prosthesis with uniform thickness. Studies are lacking on the monomer-based ester compounds that are used in RP with regard to allergenic potential, residual monomer levels, material and colour stability, material compatibility with conventional relines, mechanical properties, and biocompatibility.
Due to inaccessibility of the biocompatible 3D printing denture materials and expenses, the obturator was fabricated by compression molding technique. The RP models were replicated and processed with heat cure resin. The steps in both the parts helped in assembling and precise fitting.
The technique presented is time consuming but with the further development in technology and material science, will make this step very easy and affordable.
Conclusion
The obturator fabricated by this technique was accurate in fit, uniform in thickness, lighter in weight, dimensionally stable as compared to conventional method. It provides better retention and stability to the denture. The technique is cost-effective in terms of material used and time spent for processing. It can be an alternative method in case of inaccessibility of printable denture material.


